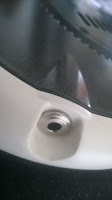
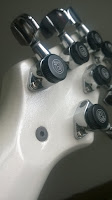
Ibanez GSR 200 bass modification
A friend of mine had a damaged Ibanez GSR 200 electric bass and one of the pots had been damaged, so he donated the instrument to yours truly for a little tinkering. The model is from 1999-2003, not 100% sure of its origin but it's a good enough low tier instrument.
I wanted to try doing something really crazy with the instrument, but I had to live according to the restrictions of working at home with only basic hand tools and a powered hand drill available.
First thing was to strip the instrument clean, so I removed the pickups and bridge and pots.
Then I came down to planning what I want to do with this instrument.
I had seen a video where a bigsby style tremolo was installed on a bass, so I wanted to do that.
In addition I wanted to install a blade style sigle coil guitar pickup on the instrument that I had in storage as well as a blade style J-pickup, both are cheap china-manufactured things.
On Ebay I found a tune-o-matic bridge for bass and also bought a piezo setup for electric violin that I intended to install under the bridge. The bigsby style tremolo I found from a local instrument part store.

Now a word on the shimmerstick installation.
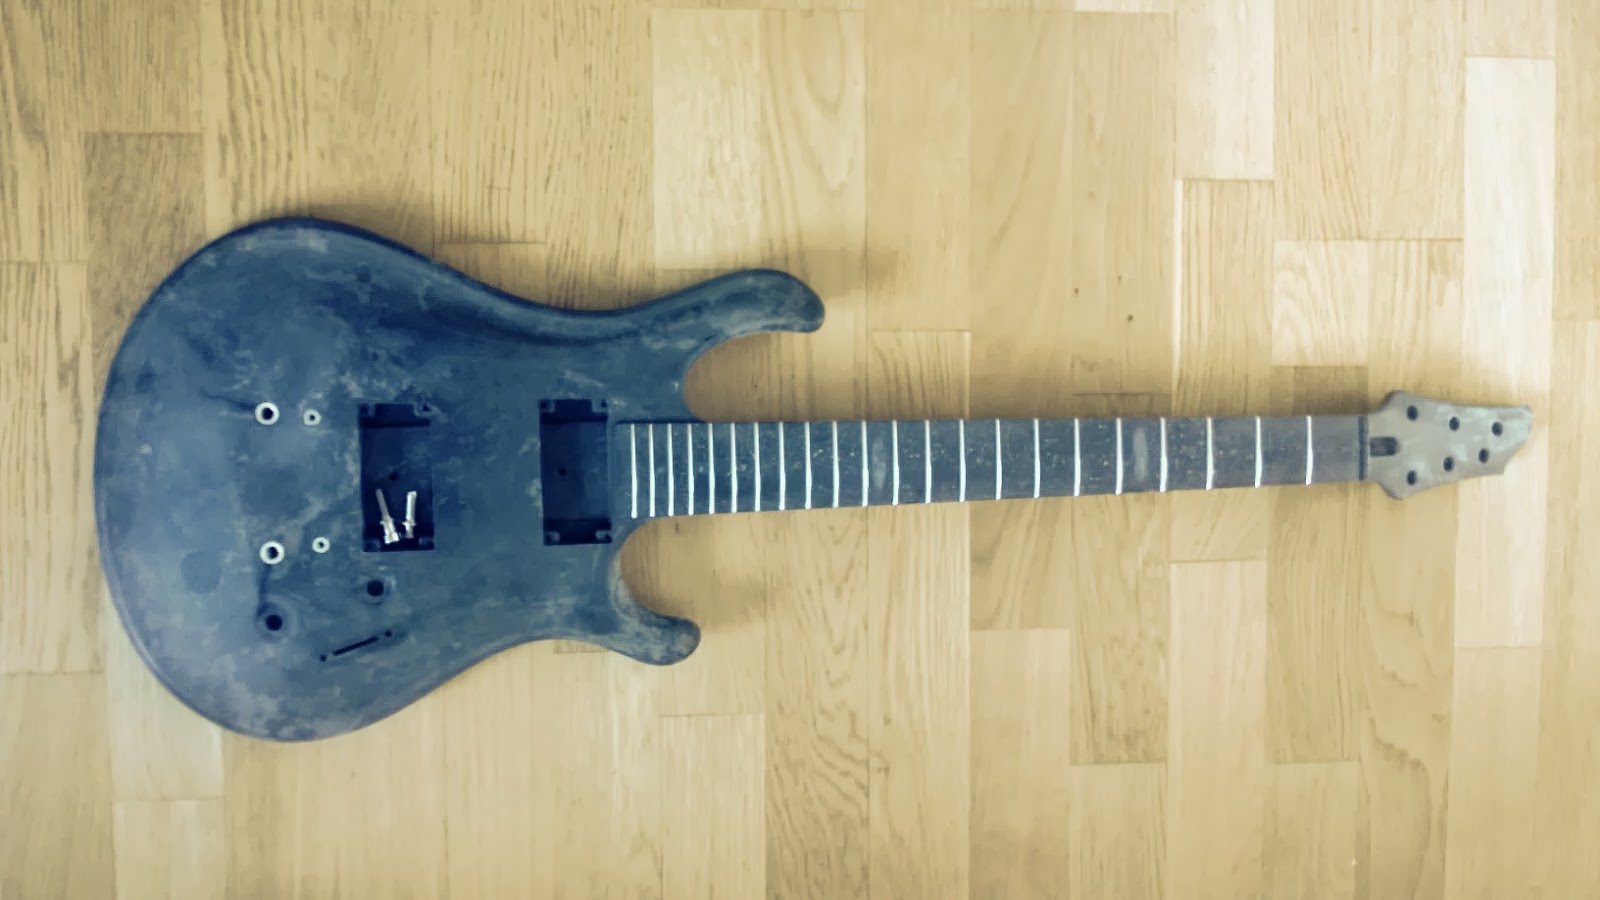
First off I needed to remove most of the string pegs and then re-drill holes for two of them to get closer to a bass string spacing. The bridge is also at a sharper angle than normal to keep the strings somewhat straight. The saddles needed to be filed and rounded for easier string movement in order for the tuning to be held a bit better. As the whole system including bridge take up way more space than a basic bass tail the scale is bound to be messed up, so that was just a sad fact I had to live with, but now ONWARDS!
What I needed to do was fill up the J-pickups cavity and place the Tune-O-Matic bridge there. Then I modified the P-pickup cavity to fit the new J-pickup.
I painted the wooden blocks used as filler with black gesso and poured resin over so it would fit in a bit better with the overall finish of the instrument.


As said I was restricted in ways of tools and doing a full paintjob on the instrument was out of the question. The result was good enough and I found myself pleased with the Frankenstinesque aesthetics where the imperfections and modifications are visible.
Next up I got to drilling and sanding a hole for the single coil guitar pickup. And finally I drilled new holes for the wirings. For this I needed a long drillbit.
At this time I made the first try to see how the strings settle down and noticed the breakangle for the neck was way so I needed to make a slim wooden block to bring up the neck a bit. Now there is space to set the action higher and lower with the bridge.

When I got down to testing the pickups I noticed that the balance on the pickups vs piezo was way off.
Without amplification there was no sound coming out of the pizeo, so I ended up installing a small amplifier into the control cavity. It does create a bit of problems, like huge pops and crackles when switching picups and the singlecoils hum like hell as they are not meant to be amplified like this.
The controls for the bass is individual volume pots for the single coil and J-pickup, and volume + tone for the piezo pickup. There is also a three-way switch with options piezo - humbucker AND J-pickup or all 3-pickups.
Finally it was time for strings. I decided to go for D'addario XL "Chromes" flatwound super light 40/60/75/95 strings.
IT might not be pretty or look factory fresh, but I did manage in making an interesting instrument for noise, industrial, and experimental music
"Yggdraskull" bowed lyre
Growing weary of the guitar format for string instruments and with an escalating intrigue for folk instruments I decided to build a bowed lyre (in Finland known as Jouhikko (
LINK)) with a longer scale and specifically built for playing amplified.
I must say, at this time I am still extremely proud of this build. It is the most beautiful instrument I have made to date, even if it is (a literal) pain in the back to carry around for gigs.
The wood of choice was Finnish birch due to it's availability at my Father-in-law's workshop.
We glued together the body from 4 pieces for easier handling in the shaping process. The outer lines were planned with aesthetics and usability in mind, hence the large curves for resting the instrument against the thigh.
I had a vision from the beginning of doing a woodcarving for this project and wanted something "nordic" and "folksy" as a thematic, hence Yggdrasil. By chance I managed to give parts of the carving the look of a skull and hence named this instrument "Yggdraskull".
The carving was made on 8 mm plywood.
As the instrument was planned for amplified, rather than acoustic, use I could leave the echo chamber smaller and with thicker walls. The hole for the woodcarving was made with a circular saw before the carving process. I used a vertical cutter to carve out the echo chamber.

The string holder and bridge were made from apple tree.
While most of the elements in the instrument were self made,
I needed to go out and buy a few things.
The strings are cello strings and the tuning pegs are boxwood pegs that I purchased online (
LINK).
For fastening the stringholder I acquired some brown leather band.
The electronics are a cheap set for electric violin with a slim piezo microphone.
Finishing for the instrument was made with Osmo Color clear woodwax (
LINK), that I have used on some of my earlier guitar projects also.
I felt that woodwax would be more in line with the craftmanship and nature of the instrument than a heavy varnish.
Less than a week after completition I carried the instrument with me to Kukemuru Ambient Festival 2019 (
LINK) where I played a set as the closing act of the opening day.
FASCINERA KanteleCheers. I'm here with a really quick one this time around.
This was a nice little weekend project after I took a trip to my local IKEA (
LINK). It took me around 2-3 hours in all to fix everything together.
The electronic parts were scavenged from old projects and spare parts I never came around to using.
Anyways. the main ingredients of this project were aquired on a trip to IKEA.
- 1 x FASCINERA chopping board
- 1 x MÖLLARP handle
- 6 x MÖLLARP knob
And from my own stash.
- 1 x blade bass pickup
- 1 x volume pot
- 1 x 1/4" Jack socket
The plan is simple. The chopping board makes the instrument body, the handle makes the stoptail for the strings and the knobs emulate tuning pegs.
The positioning of the handle was made on aesthetic basis and the bass pickup was aligned according to the handle. My suggestion is to use a blade pickup so it's easier to align the strings. I used this Wil-series Hot Rail Jazz pickup (
LINK).
Notice that the handle could be any from the vast IKEA collection. For me the desicion was driven by looks and price.
The ground wire from the elctronics is connected to one of the screws from the handle.
After the pickup was fastened I filed grooves into the handle to keep the strings in their place. then fastened the two strings, the top and bottom string. Now I could measure the position of the tuning pegs (knobs) so that the strings would be placed over the pickup.
Finally I drilled holes for the knobs and fastened them onto the board. Also the knobs were filed so the strings get a small groove for better alignment.
The strings I used on this project are also random strings I had lying around.
The main con in this project is that the intrument won't hold any tuning except 'un-tuned'. This is something that will need future investigation and planning. Then again the chopping board has the most amazing sustain - I love it!
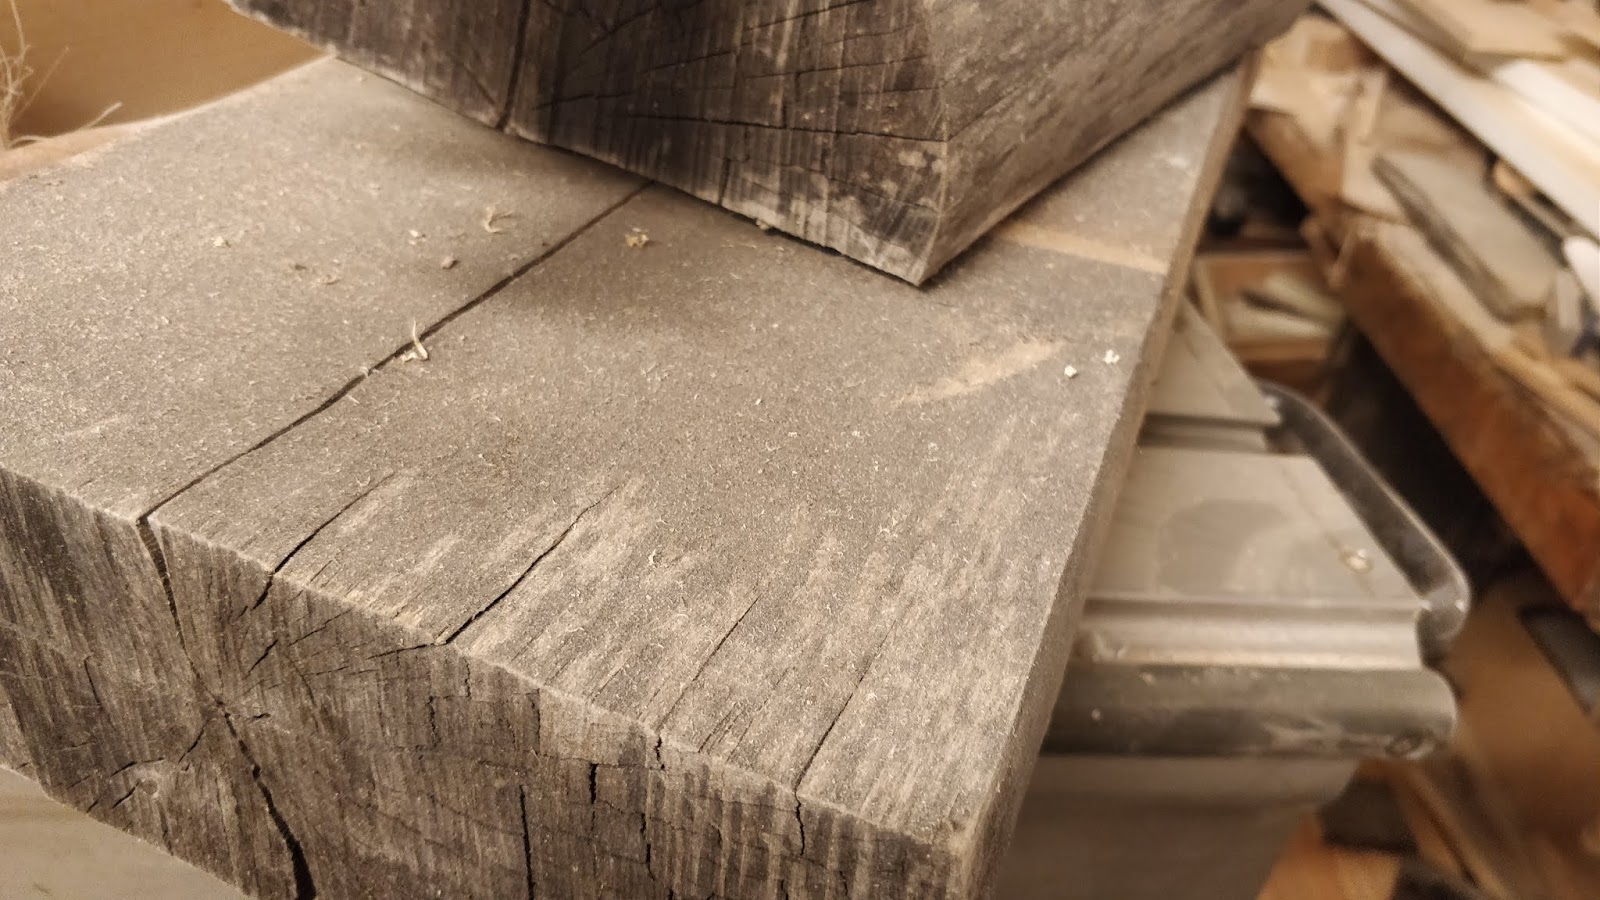
Monster lap-steel

During the late summer of 2013 I wanted to make something out of the spare parts I didn't want into my own projects.
...so what I did was ask a friend of mine to arrange some basic wood for me that I could mould into a scrap-part lap-steel style guitar.
The two pieces of "two-by-four" spruce got to function as body. I cut one of the pieces into three parts which made up the base, the end and a bridge between the humbuckers. The uncut part functioned as the neck.

The neck part also needed to be thinned down for the tuning pegs. For this project I didn't have any hi-tech tools so the finishing is somewhat raw.

As said, the parts were leftovers from other projects, such as the Stock mics and electronics from a Epiphone Gothic Explorer (
LINK) and the tuning pegs were from my earlier project, the Vinatge VS6 (
LINK).
The assembly was fairly straight forward and small flaws didn't matter that much as my friend is a noise musician. The polycarbonate was added when I noticed I had no place to attach the electronics, but in hindsight it's also a very cool design element.
I also had to add screws as string guides to hold the strings in line before the tuners, so as I said, it was a very raw and unfinished project.
The toughest part in this project was handling the materials without proper power-tools. but at the same time the build was satisfying and fun.
To see these random pieces form into an actual playable instrument was so cool.
I asked for thoughts and experiences on this monster instrument from it's current owner
and received the following short statement:
"sexier than thou. loud and nasty. so far only acoustic tests, which have been very satisfying"
As an add-on to the instrument I also arranged a leftover piece of PVC pipe to serve as slide, so all tools were available!
The pink box... where it all began.
As this is the first post of my blog, I will start out with a little background to my building ventures.
After I started making music early in the 21st century I was interested in all instruments I could possibly lay my hands on.
One of my first points of interest was purchasing a Kantele building kit, but really never got enough courage to dig into it.
However in 2011 I finally purchased a few sets of Velleman Signal Generator mini kits (
LINK)
Of course I took my time soldering the kits together, but the time was well worth it and the ready electronics found their homes in a wooden box covered with pink&metallic contact paper.
...for future endeavors I'm thinking of changing the power intake to a 9V socket instead of the battery for more reliability.


Custom Les Paul w/ Gibson Epiphone neck

I guess it was the summer of '14 when a friend of mine sold me an custom Telecaster. The guitar had a superheavy body which had cracks here and there, a genuine Floyd Rose (
LINK) tremolo that was missing some parts, and a Epiphone by Gibson (
LINK) neck.
Well, most of the scavenged parts are still waiting for future projects , the body got a really nice treatment by my wife (
LINK) and the Epiphone neck found a home in this here project.

So having a bolt on neck I needed to find a good body - here I utilized muusikoiden.net (
LINK) a Finnish website where musicians sell their instruments, perephrials and instrument parts.

I found a custom made Les Paul body that had been constructed or modified for a bolt on neck.
It had seen better days, but it was in good enough shape. I just needed to fill in the huge gap between the neck pocket and the front rout. From there on give the body a lot of love and even more sanding.
As I decided to just go with one volume pot, I needed to fill the two extra holes in the body.
For filling a wooden plug would have been an ideal solution, but as I didn't have such available I went for some basic epoxy which is easy to apply and dries fast.

The neck needed very little work, I just removed the original tuning machines and filled the old screw holes by gluing ends of toothpics in them. After I sanded the ends down I gave the neck a layer of spray varnish.
It's starting to be a classic already, but for the tuning machines I went to Planet Waves again, this time golden. The new Planet Waves Auto-Trim tuning machines (
LINK) fit the old holes perfectly and I just needed to drill holes for the screws that secure the machines.
Easy!
With the neck ready the body needed again some more work, this time painting.
Again I used my go-to tools, Maston (
LINK) spray paint and gave the body a golden bottom layer.
I painted the body gold 2-3 times and sanded the surface between the layers. Once satisfied with the result I shielded the sides and the back of the body with masking tape and painted the top with satin black spray.
Again I applied 2 layers of black and sanded the top between the layers. Then I removed the masking tape and sprayed on varnish.
After the painting I got on with the fun part - applying the hardware.
First I hammered in the studs for the bridge and for the tailpiece, being a Les Paul the holes were fabricated for a Tune-O-Matic bridge and tail. While I used a Generic , gold, Tune-O-Matic bridge with rollers I really wanted to do something fun with the Tailpiece. so I aquired a gold Les Trem II by Duesenberg (
LINK).
The mics I selected for this build were from my privat stash of odd-scavenged humbuckers that, to my suprise, have quite a nice sound. I also had a couple of black tilted humbucker frames waiting to be used.
The clean gold/black look is perfected with the single pot topped off with a gold barrel knob and black Schaller style strap lock pins.
Finally with hardware and mics applied I could string this elegant beast with my trusty Ernie Ball Super Slinky (
LINK) strings.
Flaxwood - MOF kit MK3
Okay, there has been an unreasonably long silence from my side and this guitar was actually finished over a year ago.
There are still some small imperfections on it, but I think it turned out quite beautiful anyway.

Times, there are times... when the projects feel long as h*ll.
Times, there are times... when the painting is done, then the guitar fell.
For this projects, some stupid nutcase decided it would be cool to go for a complete white glossy guitar. WHAT A GREAT IDEA!!!
It's not like white shows all flaws in the paint? right?
Anyway... coat after coat after coat with white primer and sanding in between gave a nice base for the glossy white. Sadly, as I hinted before, the guitar fell after one painting and messed up a few spots completely -> more sanding, more painting and anew coat of varnish...and a few more.
But let's start from the beginning.

I once again ordered a MOF-kit from Flaxwood (
LINK). This time it was for 2xP90 pickups and Tune-O-Matic bridge with a pre-made "f"-hole.
The neck came without pre-made slots for the frets as this was aimed to be a fretless guitar.
The first troubles at sea came along with my choice of pickups.
I went for a set of Seymore Duncan Jazzmasters (
LINK), so I needed to grind more space in the pickup slots.
The basic build was much as in my earlier two Flaxwood projects. The neck application was a breeze with Loctite (
LINK) glue but the application of the back lid craved a lot of work. Still the MOF-kit is a good way to start the guitar building hobby due to the flexible nature of the composite material.
The painting (again out on the balcony) was a real pain in the ass, craving loads of work, but finally I was done. I used a set of different spray paints by Maston (White primer, Glossy white, Glossy varnish, metallic varnish) to get the desired result.
I ended up with a very basic setup for the guitar, only a toggle switch for the pickup selection and a volume knob, Planet Waves Auto-Trim tuning machines (
LINK) a basic Tune-O-Matic bridge and a Vintage style tail.
All hardware parts are chrome.
The biggest change to my usual parts of preference was the strings. I went for DR Strings - K3™ NEON™ Hi-Def© WHITE ELECTRICs (
LINK) to give the guitar a cool look.
Appletree 1/2-size custom guitar
After working on more or less ready sets I was ready to take on a massive project.
I started it out during the summer 2013, when I aquired a 1/2 size strat style neck from a friend of mine, with the marking "Volcano" (
LINK) on it.
The next step was to discuss with my trusted wood-provider, ie. my father-in-law, about a body for the project.
Knowing the guitar would be a gift for his grand daughters he suggested apple tree, an old tree they just cut down at his childhood home. So on many accounts this project provided to be emotionally meaningful.
The last piece of the puzzle was to figure out the body shape. I scavenged through the internet until I came upon some beautiful shapes at Ed Roman Guitars (
LINK). The shape reminds me of the one of classic string instruments with added cut-outs for a more sinister look.
Another important part of the design was that it needed to be mirrored for optional "left-hand" playing.
All in all the shape turned out to be a smash hit!
After fitting the neck I noticed that the headstock was way out of style compared to the body, so I went for a nice and slimmer design that resembles an eagles beak.
With the shaped headstock the guitar got a sleaker, less bulky, look to it.
I later used the same design for my "punk-tele" (
LINK).
The paintwork was also something that took time to figure out "which way to go". I finally decided to only do the neck and the top of the body.
I painted the edges with Osmo Color (
LINK) Ebony colored wax and then sanded the edge to give the dark color a transcending look towards the middle.
To smooth it off further I added come Cognac colored wax over the whole top and finished it off with spray varnish.
The electronics I desided to keep simple. Single humbucker with only volume pot. Can't get more basic than that.
My weapon of choice this time around is a DiMArzio D Activator™ neck-humbucker (
LINK) that I purchased 2nd hand which gives the little beast a great sound.
The wrap-around hard tail, by Duesenberg (
LINK), lifts the strings a bit too high above the body, but by adding a bit of angle to the neckjoint the strings came farely low over the fretboard.
So in the end of this story we have the trusty Waves Auto-Trim tuning machines (
LINK) together with the Ernie Ball Super Slinky strings (
LINK) that have become something of a trademark in my builds.
Then the only thing that was left was packaging and thus Santa Clause had a huge giftwrapped box in his bag of gifts...
The guitar is still a bit big for the girls, but they are quickly growing into it. :)

Harley Benton Telecaster-kit

To start off the debate, I have to say that on a personal level I've always found the Telecaster to be the ugliest guitar shape ever made.
This thought was what ignited the idea of creating a punk guitar, which shouldn't bask in style or glory.
With this in mind I purchased the Harley Benton Telecaster-kit from Musikhaus Thomann for a quite affordable price.
The kit included everything the guitar needs, but as usual I wasn't quite content with that and needed to leave my own mark on the axe.
First off I started with using a vertical mill to expand the default bridge single coil slot to fit a basic humbucker.
This time I have sadly no idea about the humbucker specs or manufacturer. It's some random stock mic which I received in a batch of cheap, random, humbuckers.
With this done it was time to test the Tele-style bridge with intact humbucker frame. it sat well into place and the humbucker fit perfectly, but then came trouble with the pickguard.


The niche for the original bridge was narrower than the humbucker frame (yeah, no sh*t?) so I needed to grind some plastic to get everything in place. Again nothing a saw, a file and some sanding paper couldn't bite into.
Finally I still needed to drill holes for the strings, as the bridge was only configured for through body setup.
This last body modification got screwed up a bit and goes to show that not all things should be done with the "freehand" technique. The back looks quite grotesque with the string ferrules cascading in places.
All in all the body modifications were quite a breeze with this one and they were fairly easy to realize ... and even easier if I had the proper set of tools available at home.
After the necessary body mods I started pulling out the duct tape and a few hours later I had sticky fingers, but the guitar cover was taped.
Now only the final trimmings were undone. I handled the duct tape edges with a sharp surgical-knife and then it was done.
For the headstock I wanted to go with a design I had used on a modified 1/2 size Stratocaster neck (story coming up). Again without the proper tools the time spent on the headstock was quite exaggerated, but it turned out great.
Also the headstock got it's fair share of duct tape treatment and the nice cut-finish.
Last up it was out on the balcony and I sprayed the leftovers of two Maston varnish cans onto the body and the neck.
Even if not very "punk", the headstock received it's set of Planet Waves Auto-trim tuning machines, which I've come to love and use exclusively. The trimmed strings are quite good for safety with children in the house.
PUNK ROCK!!!
https://wanker666.bandcamp.com/
ML-Factory Semi-Hollow Les Paul

I saw a picture of a Duesenberg Starplayer TV Outlaw (
LINK) and it was love at first sight.
Sadly I really didn't have the money to invest into a guitar, so I started searching parts to build a replica.
The first step was to get a Les Paul hollow, or semi-hollow, body. ML-Factory's shop (
LINK) came to the rescue here with a mahogany/ash body with a pre-glued neck that saved me some time and grey hair.
Still I had a few woodwork chores, like filling up the stoptail pre-fabricated holes and one of the pot-holes. I also shaped the headstock a bit, giving it a more square look.

Even if the body seemed like a hurdle, the actual body texture gave me the most trouble through out the process. Afterall the snakeskin replica pattern was one of the elements that made me fall for the Duesenberg Starplayer Outlaw.
I finally found a store in Porvoo that make custom stencils, Laaser Riimikko (
LINK), who for an affordable price could create what I needed. This together with a magical potion know as Gel-Medium (
LINK), that my wife suggested, I was finally able to create the 3d texture on the guitar
body.
With the texture done I got on to the painting phase.
Clearly I started by shielding the plastic bindings and the fretboard, then I spray-painted the guitar (on my balcony!!!) with two cans of Maston COLORmix, Satin black, spray (
LINK).
I sprayed some two or three coats at the time and then left the guitar for seven days to dry in between. After the coats had dried there was some sanding and then re-painting again.
Finally I finished the paint with three layers of Maston COLORmix matte varnish.

Getting the parts together was also quite the task, but nothing compared to making the texture.
Starting from the tuning pegs I went again for the Planet Waves Auto-Trim tuning machines (
LINK) but the other parts craved a bit of searching. I managed to find Duesenberg's Bigsby style tremolo (
LINK) as well as Duesenberg's humbucker size P90 Domino (
LINK), but for the bridge mic I went for Kinman's Extra Vintage humbucker (
LINK).

Another of my 'obvious choices' was using the Ernie Ball Super Slinky strings (
LINK).
It's just a thing I've grown (too) accustomed to. :)
The bridge is a basic/bulk Tune-O-Matic and I went for a standard Lock nut, everything in shining chrome and nickel.

Personally I just love the clean black, white and sparkling metal look. It gives the whole guitar a majestic look.
In all honesty, this guitar was 75% about looks, but it's not a bad one to play. The frets might need a bit of work still as the low E resonates when played, so this still needs a bit of work. Also the guitar looses the tuning quite easily when you go crazy with the tremolo.
I still do love the sound of those vintage style mics.
Flaxwood - MOF kit MK2

Maybe a bit dull, but my following guitar project, after my black-on-black MOF-kit (
LINK), was another MOF-kit - This time building it with leftover Wilkinson parts from my Vintage Electronics VS6 (
LINK).
I just couldn't leave the parts lying around now could I? :)
All in all there is very little to add to the previous MOF build.

As said, both the Tune-O-Matic and the pickups are Wilkinson parts and as always, the tuning pegs are Planet Waves Auto-Trim tuning machines (
LINK)
The fretboard markings were filled in with epoxy glue as in the previous build and the finish was made with transparent Osmo color woodwax (
LINK).
Again the kit came in good condition and was usable with fairly little work. of course some sanding was needed but that should go without saying.

The body came with pre-fabricated holes for the Tune-O-Matic bridge, but the stoptail needed a great deal of work to get into place.
The bridge just needed some sanding to get it low enough for a proper string height, mine are still a bit high.
Also, due to the structure of the hollow body it took quite the time and some trials and errors before the tail was in place.
Here I came upon the important notion that, compared with wood, the Flaxwood composite material is harder and cracks easier, so make sure the holes you drill are large enough or else you will need some more glue to repair the damage.
Flaxwood - MOF kit MK1

After modifying the Vintage VS6 (
LINK) I really started thinking about getting a ready guitar kit to assemble. After first spotting a Flaxwood (
LINK) guitar in the hands of my friend Tuomas (Bullet Control (
LINK)) I fell in love with the idea of this composite material axe.

So I went right away and ordered the MOF - kit straight from the Flaxwood factory. The injection-molded body and neck were beautiful straight from the pack, but indeed needed a load of sanding and preparing before they were ready for assembly.
I took my time on this project as everything was fairly new to me ...also did some wrong turns and followed non logical steps, such as starting the whole process with fitting the backplate (doh!?).

Installing the frets were a quite interesting procedure for me, as it was all new and I really had no idea of what I was doing. Thankfully I got some good advice and instructions from J-P at Flaxwood.
There really isn't enough good things I can say about the service from their side, nothing short of spectacular!

The great thing about flaxwood as a material is that it was easy to work on and the gluing were made with Loctite (
LINK) superglue(!). It really took no time to attach the neck and nut when I got that far in the process.
The joints were all formed for easy fitting.
Getting down to hardware, I had already decided to go for an all black look on this guitar and wanted it with tremolo, so the body came with pre-fabricated hole for the Schaller Tremolo LP (
LINK). I also decided to go for the Planet Waves Auto-Trim tuning machines (
LINK) that I already had found to be superb.
The process of installing the tuners was very straight forward and I only needed to drill open the holes a bit to fit the pegs.

I was very impressed with the sound of EMG active pickups and hence I tried out the EMG KFK-kit (
LINK) for this build ... and I can say I haven't regretted my decision yet.
The solderless system was easy to connect and only a bit of head scratching was needed to connect the pickups to the EMG solderless Strat switch (
LINK).
The body and neck finishing was made with Osmo Color (
LINK) transparent wood wax so that the cool textures of the composite material stayed visible. Application of the wax was super easy, just dipped a rag in it and saw to that the whole body got a piece of it. 3-4 layers later it was a done deal.

Initially I was setting up some Ernie Ball Skinny Top/Heavy Bottom (
LINK) strings but the tremolo spring couldn't handle them, so I switched to my (now) exclusivly prefered Super Slinkys (
LINK) which give a nice bright'n'tight sound.
Finally it took some detective work and a great deal of tweaking and rasping to get the final setup right. Seems that one of the frets had been left a bit high, so I lost a note on the high "E".
Now it's a beautiful all-black stealth guitar with a living surface coloring due to the composite material.
The neck is very fast and comfortable with good action, though a professional could probably tweak it a bit more for even better playability.
For me however, it is a splendid axe!
Vintage VS6 - Mod
So now we can move forward to a new chapter of my instrument building odyssey,
After owning a few guitars of different quality and gauge, I grew increasingly interested in assembling something of my own.
However, as a first step I got myself a very affordable, but well constructed Vintage VS6 (
LINK).
First order of business was to replace the Wilkinson passive humbuckers with an EMG JH signature active pickup set (
LINK).
The operation was strangely straight forward and I got the new pickups running within an evening.
Of course the story doesn't end here... Next up I wanted to try out different components, so I acquired a Stetsbar Pro II (
LINK), which needed no additional routings to the guitar body and utlilizes the original Tune-O-Matic bolt holes.
One of the main issues I had decided to change was the awful looking vintage tuning pegs.
After some investigation I decided to go for the all black Planet Waves Auto-Trim tuning machines (
LINK).
This was a choice I've been very happy with and I have exclusively purchased the same tuning pegs since.
As for minor changes, that enhanced the look a lot, I changed the plastic knobs into black barrel style knobs... and removed the "rhythm / treble" sticker from the switch.
I later acquired a Schaller Tune-O-Matic tail with built in piezo system (
LINK) (that I sadly never got running) and ended up with all black hardware.
Epilogue:
During the summer 2013, I changed the Schaller Tune-O-Matic stop tail back to the Stetsbar when I sold the guitar to my good friend.
I must say the Vintage electronic guitars are of incredible quality and the guitar had good action.
This guitar was what ignited my will to really start picking the strings as well as gave me confidence to move on the other projects....


 Growing weary of the guitar format for string instruments and with an escalating intrigue for folk instruments I decided to build a bowed lyre (in Finland known as Jouhikko (LINK)) with a longer scale and specifically built for playing amplified.


 The string holder and bridge were made from apple tree.


 During the late summer of 2013 I wanted to make something out of the spare parts I didn't want into my own projects.
 The neck part also needed to be thinned down for the tuning pegs. For this project I didn't have any hi-tech tools so the finishing is somewhat raw.
 As said, the parts were leftovers from other projects, such as the Stock mics and electronics from a Epiphone Gothic Explorer (LINK) and the tuning pegs were from my earlier project, the Vinatge VS6 (LINK).

 I guess it was the summer of '14 when a friend of mine sold me an custom Telecaster. The guitar had a superheavy body which had cracks here and there, a genuine Floyd Rose (LINK) tremolo that was missing some parts, and a Epiphone by Gibson (LINK) neck.
 So having a bolt on neck I needed to find a good body - here I utilized muusikoiden.net (LINK) a Finnish website where musicians sell their instruments, perephrials and instrument parts.
 I found a custom made Les Paul body that had been constructed or modified for a bolt on neck.
 The neck needed very little work, I just removed the original tuning machines and filled the old screw holes by gluing ends of toothpics in them. After I sanded the ends down I gave the neck a layer of spray varnish.


 Times, there are times... when the projects feel long as h*ll.
 I once again ordered a MOF-kit from Flaxwood (LINK). This time it was for 2xP90 pickups and Tune-O-Matic bridge with a pre-made "f"-hole.


 The niche for the original bridge was narrower than the humbucker frame (yeah, no sh*t?) so I needed to grind some plastic to get everything in place. Again nothing a saw, a file and some sanding paper couldn't bite into.

 I saw a picture of a Duesenberg Starplayer TV Outlaw (LINK) and it was love at first sight.
 Even if the body seemed like a hurdle, the actual body texture gave me the most trouble through out the process. Afterall the snakeskin replica pattern was one of the elements that made me fall for the Duesenberg Starplayer Outlaw.
 Getting the parts together was also quite the task, but nothing compared to making the texture.
 Another of my 'obvious choices' was using the Ernie Ball Super Slinky strings (LINK).
 Personally I just love the clean black, white and sparkling metal look. It gives the whole guitar a majestic look.

 Maybe a bit dull, but my following guitar project, after my black-on-black MOF-kit (LINK), was another MOF-kit - This time building it with leftover Wilkinson parts from my Vintage Electronics VS6 (LINK).
 As said, both the Tune-O-Matic and the pickups are Wilkinson parts and as always, the tuning pegs are Planet Waves Auto-Trim tuning machines (LINK)
 The body came with pre-fabricated holes for the Tune-O-Matic bridge, but the stoptail needed a great deal of work to get into place.
 After modifying the Vintage VS6 (LINK) I really started thinking about getting a ready guitar kit to assemble. After first spotting a Flaxwood (LINK) guitar in the hands of my friend Tuomas (Bullet Control (LINK)) I fell in love with the idea of this composite material axe.
 So I went right away and ordered the MOF - kit straight from the Flaxwood factory. The injection-molded body and neck were beautiful straight from the pack, but indeed needed a load of sanding and preparing before they were ready for assembly.
  Installing the frets were a quite interesting procedure for me, as it was all new and I really had no idea of what I was doing. Thankfully I got some good advice and instructions from J-P at Flaxwood.
 I was very impressed with the sound of EMG active pickups and hence I tried out the EMG KFK-kit (LINK) for this build ... and I can say I haven't regretted my decision yet.


